Configuring Cloudpinas
With Zycoo IPPBX
Configuring a SIP Trunk
Step 1: Create an Account with Cloudpinas
Step 2: Add the VoIP Provider Account in the IPPBX
After you get the VoIP provider account, you need to configure the account in your Zycoo IPPBX.
1. Go to Basic > Trunks > VoIP Trunks page and click New VoIP Trunk.
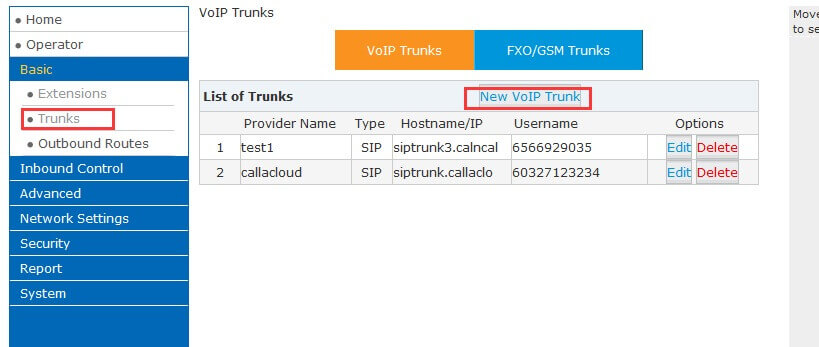
2. Enter the SIP account details in the pop-up window.
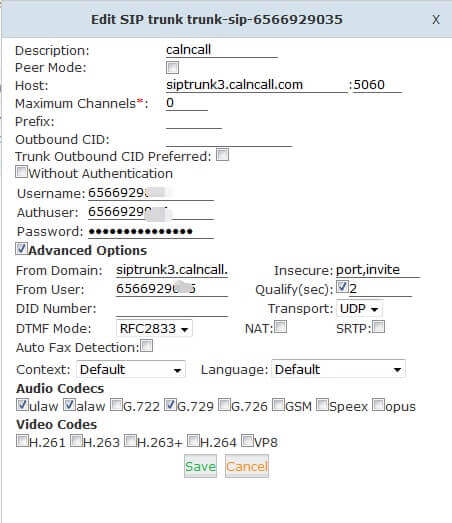
Trunk Name: customize your trunk name here.
Hostname/IP: siptrunk.callacloud.com
Domain: siptrunk.callacloud.com
User Name: your Cloudpinas Account user name
Authorization Name: the same as the user name
Password: your Cloudpinas Account password

3. Click Save button and Activate Changes. Go to Operator to check if the Service Provider trunk is connected successfully.
Outbound Route with Cloudpinas SIP Trunk
To make outbound calls via the new SIP trunk, you need to configure an outbound route for the trunk.
1. Go to Basic > Outbound Routes, click Add DialRules > New Dial rule.
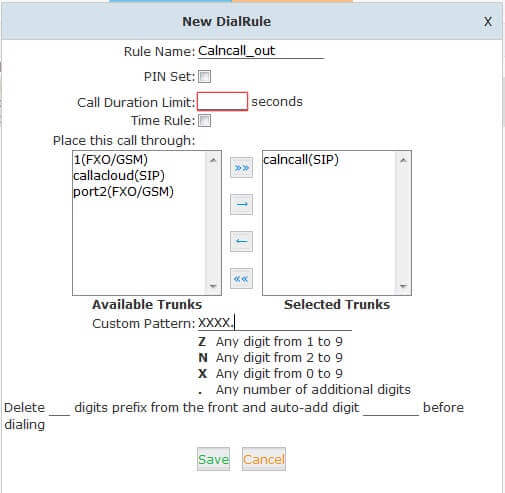
The rule means it can allow over and equal 5digits number for outgoing ,e.g 10000 or other number 85337096
2. Go to Basic > Outbound Routes, click > DialPlans > Dialplan1 > Edit
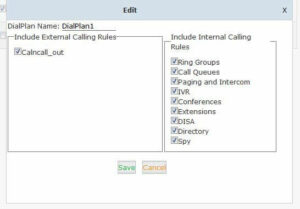
Tick the rule, then you can call out
Inbound Route with Cloudpinas SIP Trunk
Specify how calls from the Cloudpinas SIP trunk should be routed. You need to configure an inbound route for the SIP trunk.
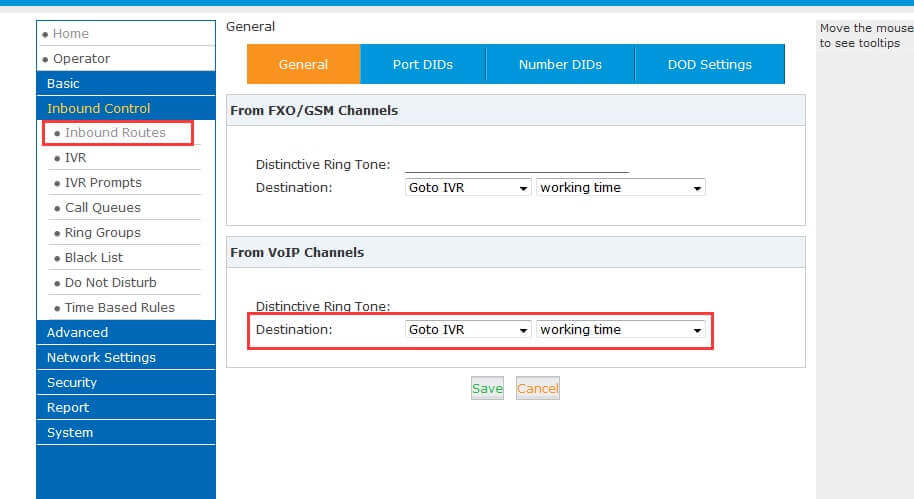
Then when you make an incoming call you will hear the default prompt.
